Configuring SAML Authentication for Okta
Current Team Password Manager version: 14.190.309This document describes how you can configure SAML Single Sign-On Authentication in Team Password Manager using Okta as the Identity Provider (IdP). Read the SAML Authentication document to learn how SAML Authentication works in Team Password Manager.
Follow these steps:
1. Log into Okta's admin dashboard.
2. Click on Applications, and then "+Add Application".
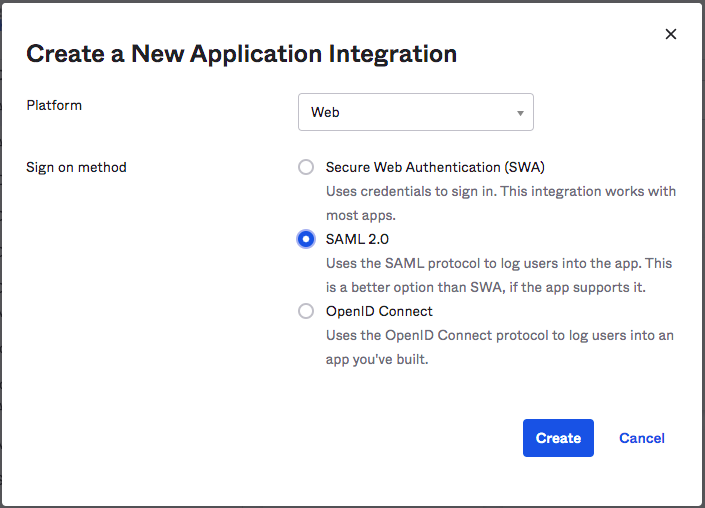
3. Click on "Create New App" and in the "Create a New Application Integration" screen select "Platform: Web" and "Sign On Method: SAML 2.0". Click "Create" to proceed:
4. In the "General Settings" screen Enter the App name (Eg. Team Password Manager) and logo. You can use the our logo located here if you want: https://teampasswordmanager.com/assets/img/public/teampasswordmanager.jpg. Then click "Next":
![]()
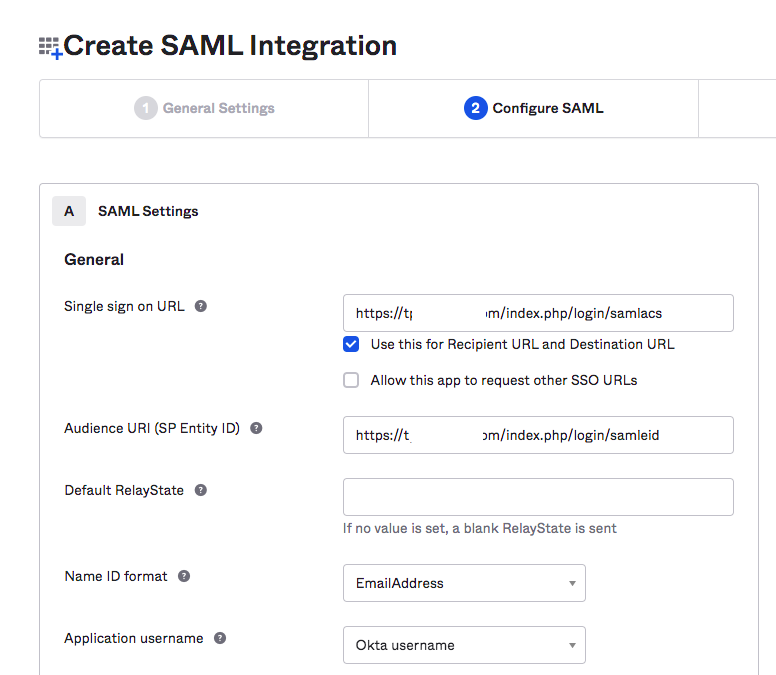
5. In the "Configure SAML" screen enter the Service Provider (Team Password Manager) details:
5.1 Log into your installation of Team Password Manager and go to Settings (top menu), then "SAML Authentication". Enable SAML Authentication if it's not enabled.
5.2 Copy the "Entity Id" value in the "Service Provider Settings" in Team Password Manager to the "Audience URI (SP Entity ID)" field in Okta.
5.3 Copy the "Assertion Consumer Service URL" value in the "Service Provider Settings" in Team Password Manager to the "Single sign on URL" field in Okta.
5.4 Choose the following "Name ID Format": "EmailAddress".
6. Finish the configuration clicking "Next" in the next screens until then end. Use the defaults presented. You'll land in the Application summary page.
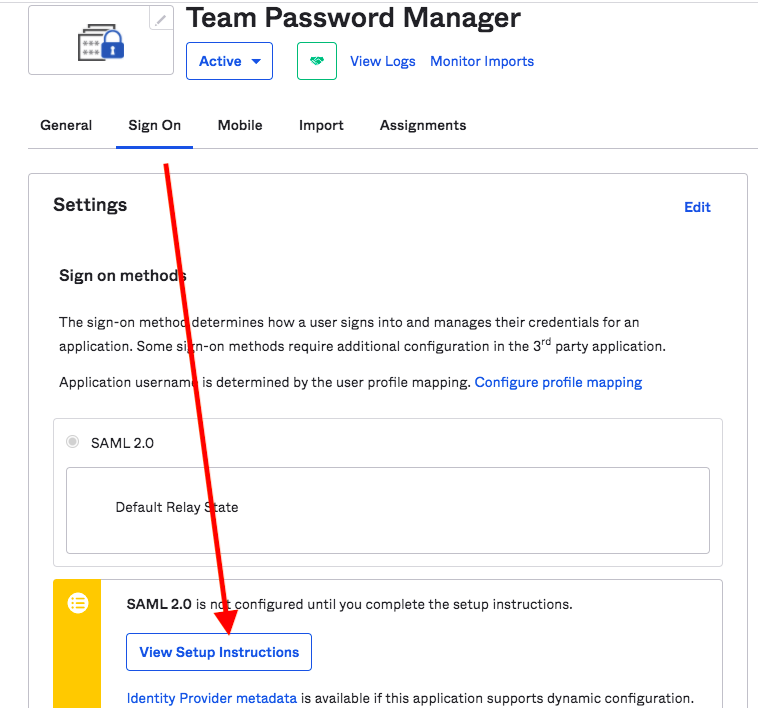
7. Select the "Sign On" tab and then click on "View Setup Instructions":
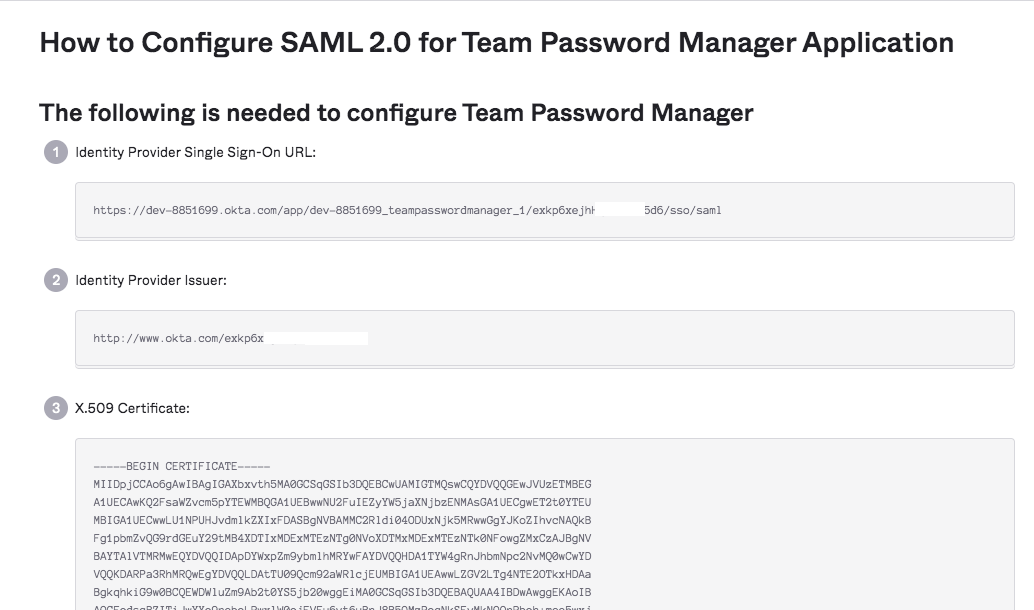
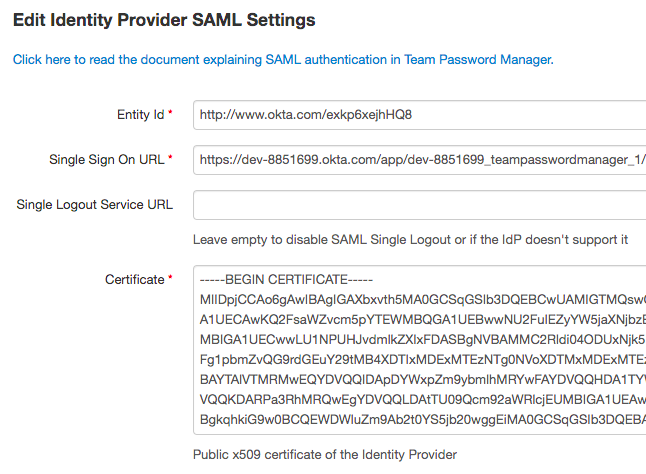
8. A new screen will be opened with the Identity Provider (Okta) details. Copy the Identity Provider details to Team Password Manager:
8.1 Copy the "Identity Provider Single Sign-On URL" value in the Okta IdP details and paste it in the "Single Sign On URL" field in Team Password Manager.
8.2 Copy the "Identity Provider Issuer" value in the Okta IdP details and paste it in the "Entity Id" field in Team Password Manager.
8.3 Leave the "Single Logout Service URL" field in Team Password Manager blank.
8.4 Copy the "X.509 Certificate" value in the Okta IdP details and paste it in the "Certificate" field in Team Password Manager.
8.5 Click on "Save" in Team Password Manager. You can close the Okta IdP details screen.
9. Assign the application to users. To do it, click on the "Assignments" tab in the application summary screen and then on the "Assign" dropdown. Then click "Assign" on the users you want to assign. Make sure you use the email address of the user in the "User Name" box.
SAML authentication for Okta is now configured. To test, do this:
- Make sure you have an Admin/IT normal user in Team Password Manager. If anything goes wrong you'll be able to log in normally.
- Create a SAML user in Team Password Manager, using an email address that matches an email address of a user in your Okta account.
- Log out of Team Password Manager and Okta.
- Click on "Sign In via SAML" in Team Password Manager. You'll be taken to Okta login screen and you'll need to authenticate using the email address of the user just created in Team Password Manager.
- If all goes well, you'll automatically log into Team Password Manager.
Document changelog
| May 10, 2021: | Document created |