Blocking access to Team Password Manager from an IP address makes brute force attacks from this IP address very difficult or impossible.
Team Password Manager can be configured to block IP addresses in two ways: manual and automatic.
Manual IP address blocking
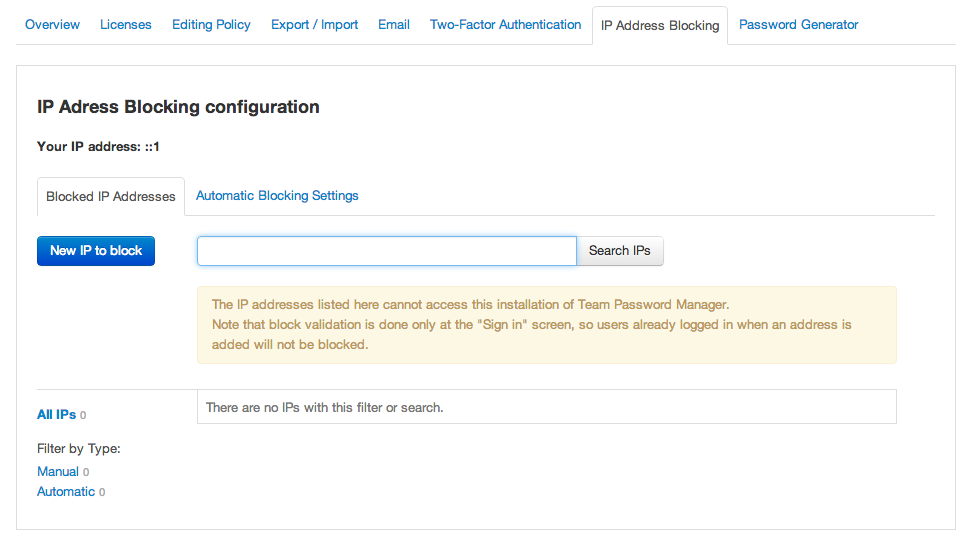
Manual IP blocking consists of telling Team Password Manager which IP addresses you want blocked. To do so, sign in with an admin user, go to the "Settings" menu and choose the "IP Address Blocking" tab:

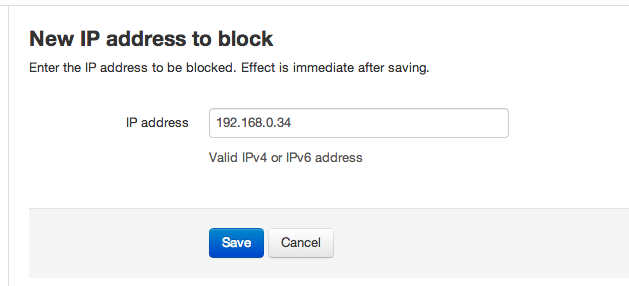
Here you can see a list of the IP addresses that your installation of Team Password Manager is blocking (it's empty the first time). To add an IP address, just click on "New IP to block" and fill in the IP address, which must be a valid IPv4 or IPv6 address. You can only enter one IP address and you cannot use wildcards:

After saving, the IP address will be blocked instantly, and users trying to sign in to your installation of Team Password Manager from it will see the following message: "Error, access forbidden".
* Important: IP blocking validation is done only at the "Sign in" screen, so if you're trying to block an IP address from which a user is already logged in, the user will not be blocked until he/she logs out of Team Password Manager.
Automatic IP address blocking
Manual IP blocking is great if you know the offending IP address. Most brute force attacks, though, will come from IP addresses you don't know. This is where automatic IP blocking comes to the rescue.
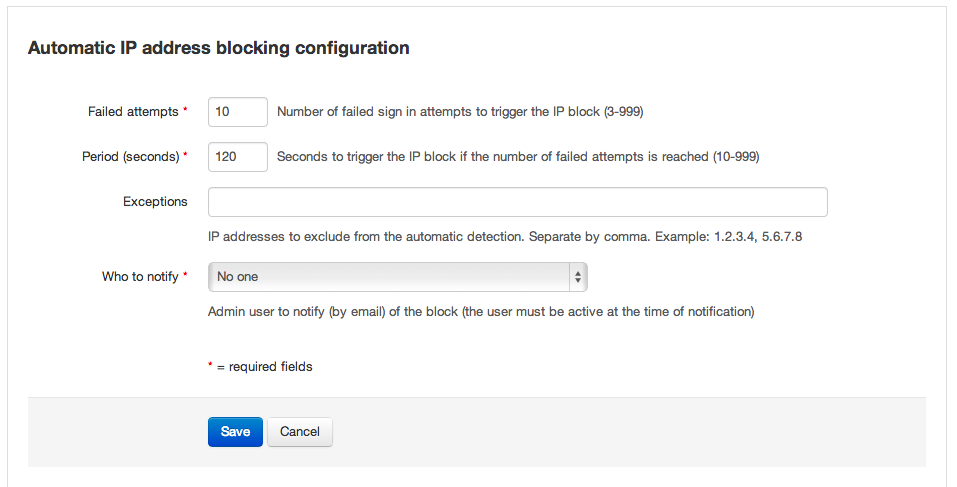
In automatic IP address blocking you define a number of failed sign in attemps that can happen in a period of time (in seconds). If in this period the number of failed sign in attempts is greater than the one set, the IP address from which these attempts are produced will be added to the list of blocked IP addresses. This way, the IP address will be blocked.
In automatic IP blocking you can also define:
- Exceptions: a set of IP addresses that are excluded from automatic detection. You should enter here the IP address(es) of your office(s).
- Which admin user to notify by email when an IP address is blocked.
To set these automatic IP blocking parameters, sign in with an admin user, go to the "Settings" menu, choose the "IP Address Blocking" tab and finally choose the "Automatic Blocking Settings" subtab.
Automatic IP blocking is disabled by default, so you have to enable it first. After enabling it, you can change the default settings by clicking on "Edit automatic IP address blocking configuration" button:

If an IP address is automatically blocked, it will be added to the list of blocked IP addresses and marked as "Automatic":

If you need to unblock it just delete it from the list. Note, though, that it can still be blocked again automatically if you don't disable automatic IP blocking.
Reverse Proxy
If your installation of Team Password Manager is behind a reverse proxy you'll need to do some additional configuration to correctly detect IP addresses.
Read our reverse proxy document to learn how to configure Team Password Manager if it's behind a reverse proxy.
