Bulk Actions on Passwords inside Projects
Current Team Password Manager version: 14.190.309Starting with version 12.154.276, we've introduced the capability to perform certain bulk actions on passwords inside projects. Let's explore how this functionality operates:
- What are bulk actions on passwords
- Who can execute bulk actions
- Selecting passwords
- Executing the bulk action
- Available bulk actions
- Bulk action: Archive / Un-archive
- Bulk action: Delete
- Bulk action: Unlink
- Bulk action: Custom fields
- Bulk action: Set manager
- Bulk action: Copy
- Bulk action: Move
What are bulk actions on passwords
Bulk actions on passwords are actions executed on multiple passwords at the same time. This helps you reduce the time you spend managing passwords. For example, say you need to move some passwords from one project to another one. You can do this manually one by one: go to the password screen, click "Move", select the destination project and confirm. Repeat for all the passwords. Or you can do it in bulk: select the passwords you want to move, choose the destination project and confirm. Done.
Please note that currently, bulk actions on passwords are only available within projects.
Who can execute bulk actions
We've limited the execution of bulk actions on passwords inside a project to those users who have "manage" permission on the project (and thus "manage" permission on the password too).
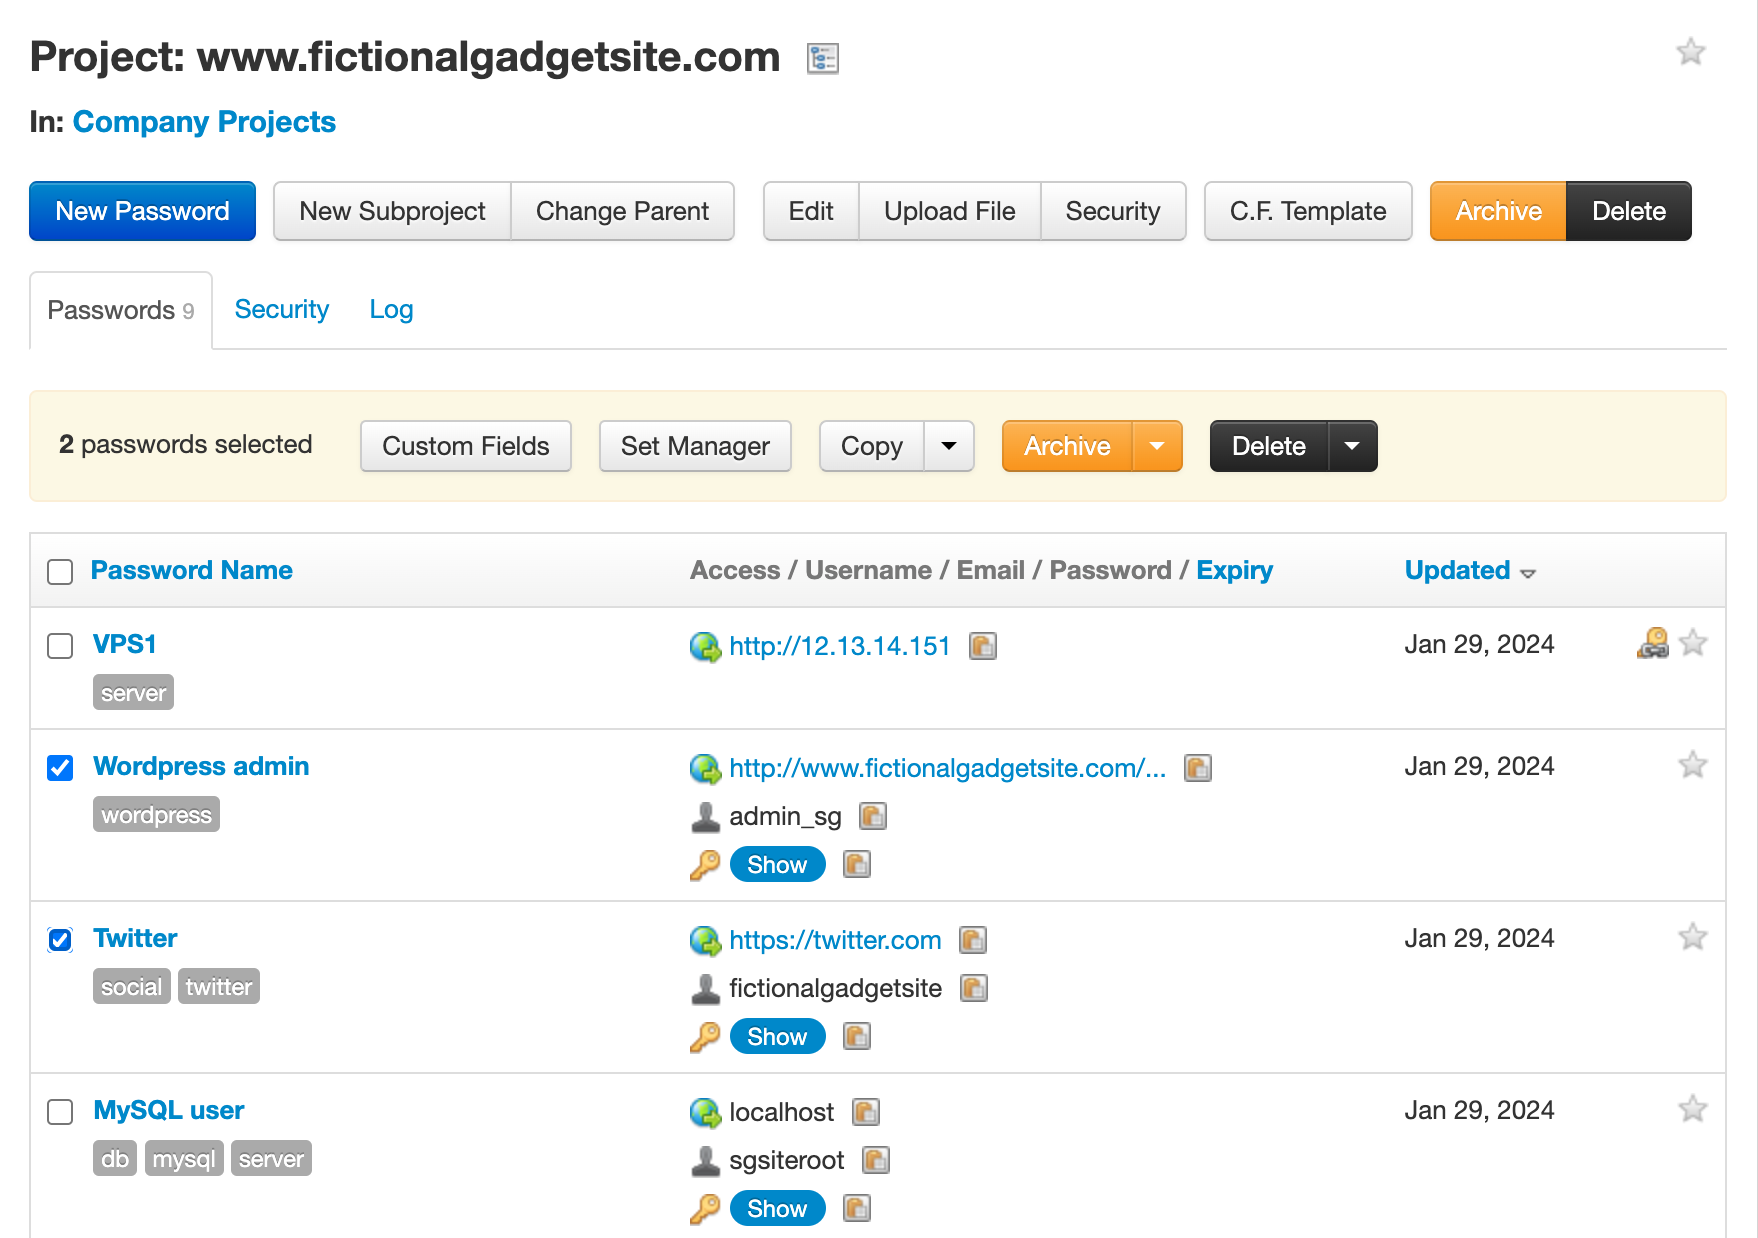
Selecting passwords
Before initiating any bulk action, it's required to first select the specific passwords you wish to target. This is done by marking the checkbox located to the left of each password name. When passwords are selected, a yellow box is displayed on top of the passwords, showing the number of selected passwords and the available bulk actions:
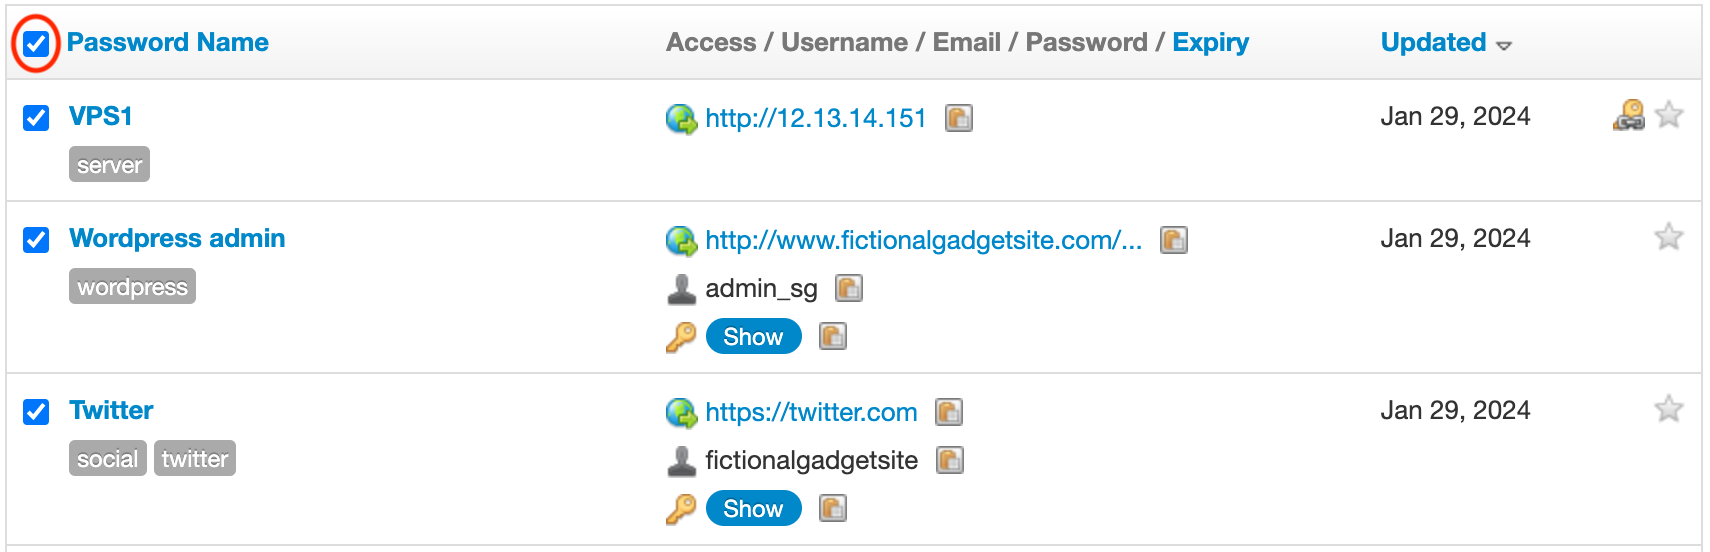
You can also select all the passwords on the page by marking the checkbox located on the passwords list header:
If you don't see the checkboxes on the left of the password names, it means you don't have permission to execute bulk actions in this project.
Executing the bulk action
After selecting some passwords, click on the desired bulk action to execute it:

The bulk action will not be executed immediately. Some actions require more data, for example a destination project, so a new window will open for you to enter it. Other actions will not require more data. In any case, before executing the bulk action, you'll be presented with a confirmation screen similar to this one:
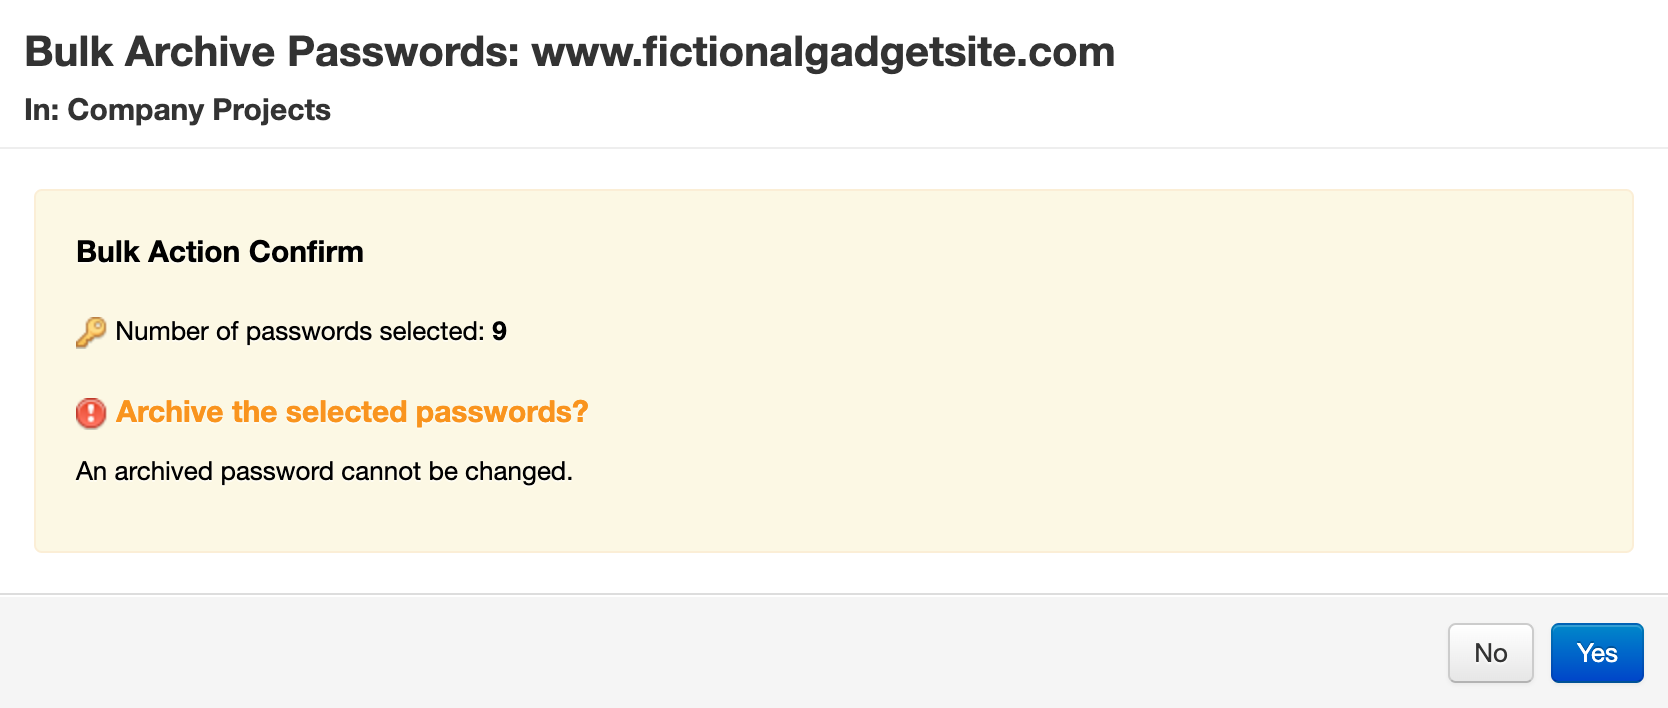
The bulk action confirmation screen shows the number of passwords selected, the action to be performed and some more data if needed. Once you click "Yes", the bulk action is executed. If you don't want to execute the action, just click "No".
After the action is executed, a final screen is presented with the outcome, like this one:
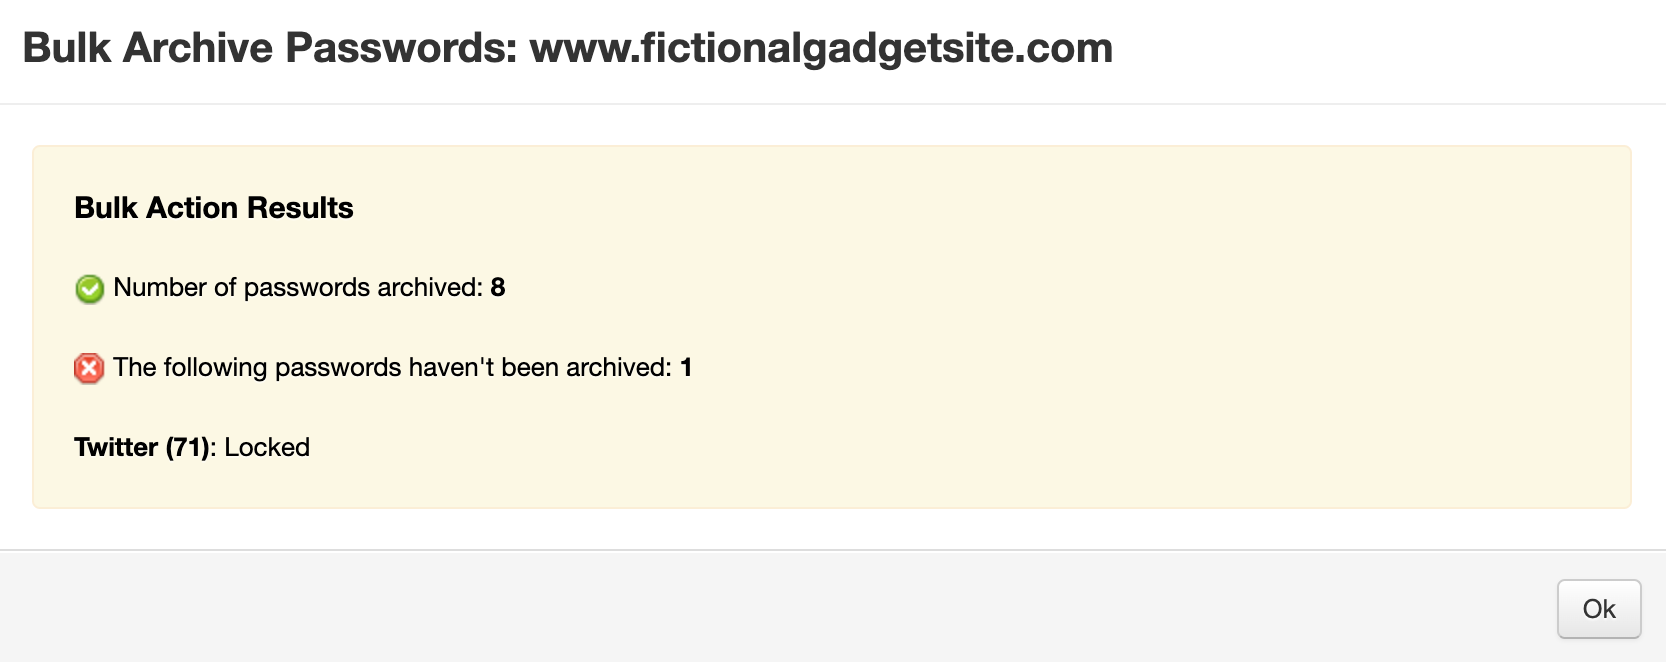
This screen will tell you:
- The number of passwords that have been affected by the bulk action. In the example screenshot, 8 passwords have been archived.
- The passwords for which the action has been impossible to execute, and why. In the example, one of the selected passwords was locked, so it wasn't possible to archive it.
Available bulk actions
These are the bulk actions that you can execute on passwords inside projects:
- Archive and Un-Archive passwords
- Delete (move to trash) passwords
- Unlink passwords
- Change the custom fields configuration of passwords
- Set the manager of passwords
- Copy the selected passwords to another project
- Move the selected passwords to another project
Bulk action: Archive / Un-archive
This bulk action archives or un-archives the selected passwords. Since no additional data is required, once you've selected the passwords, the confirmation screen for the bulk action will appear, allowing you to confirm your choice.

Bulk action: Delete
This bulk action sends the selected passwords to the trash bin. Since no additional data is required, once you've selected the passwords, the confirmation screen for the bulk action will appear, allowing you to confirm your choice.

Bulk action: Unlink
This bulk action unlinks the selected passwords (if they're linked passwords, obviously). Since no additional data is required, once you've selected the passwords, the confirmation screen for the bulk action will appear, allowing you to confirm your choice.

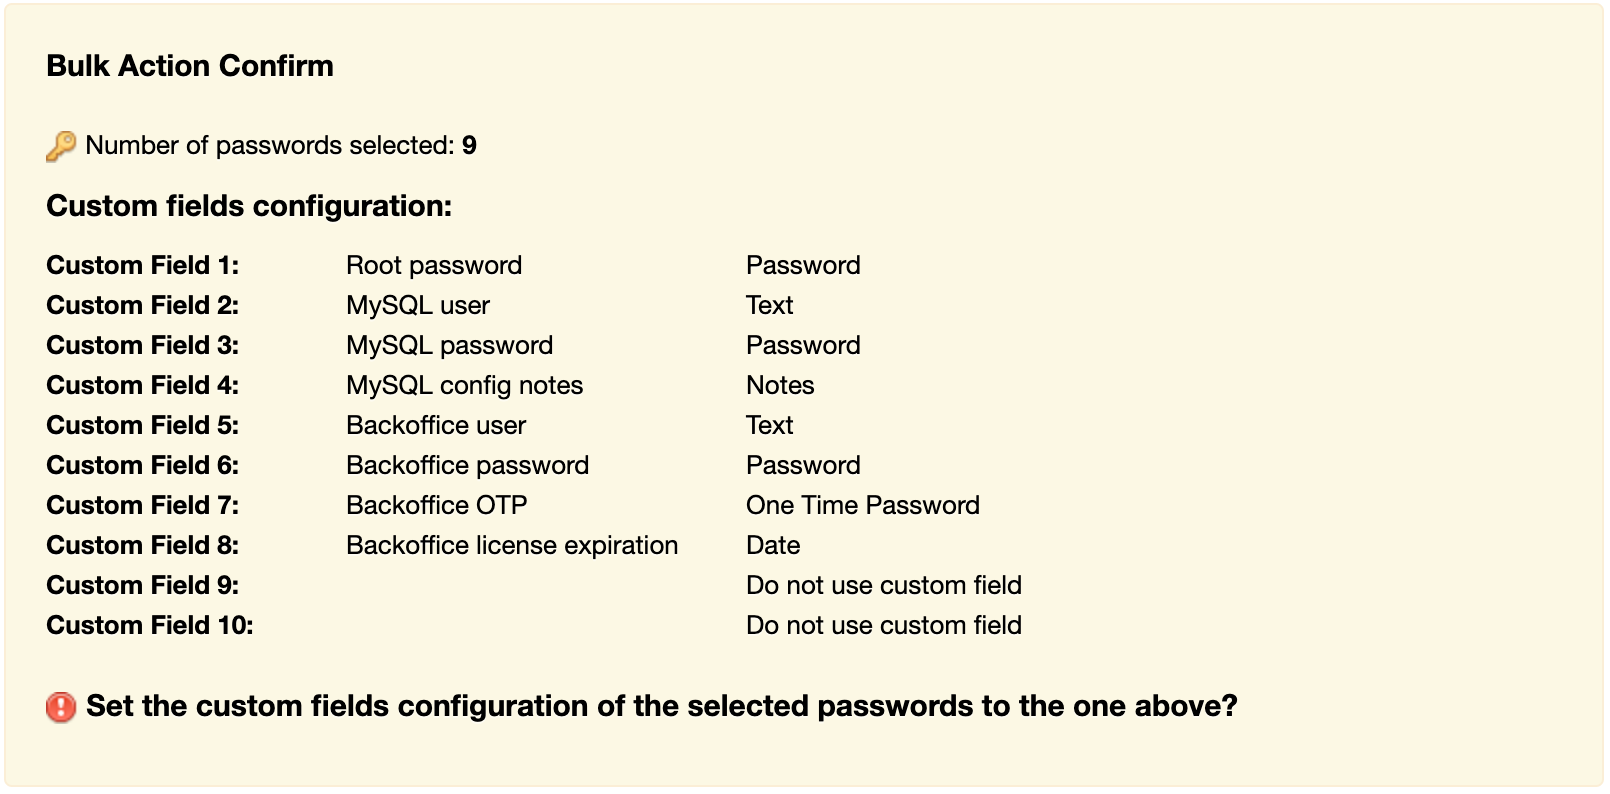
Bulk action: Custom fields
This bulk action defines the custom fields of the selected passwords. In this case, after selecting the passwords you'll be taken to the "Custom fields configuration" screen, where you'll need to enter the custom fields definition that you wish to apply. After entering the information, the confirmation screen for the bulk action will appear, allowing you to confirm your choice.
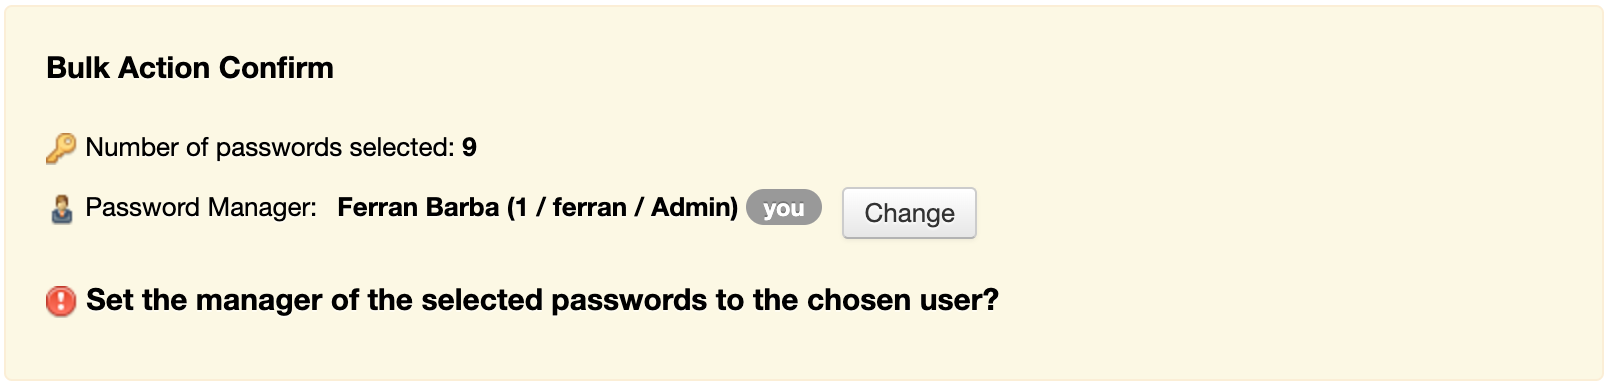
Bulk action: Set manager
This bulk action sets the manager of the selected passwords. In this case, the confirmation screen also includes a button to select the user to be the manager. Once you've selected the manager, you can confirm the bulk action.
Bulk action: Copy
This bulk action copies the selected passwords to another project. When clicking the bulk "Copy" button after selecting the passwords, the project selector screen will appear for you to choose the destination project. Finally, after choosing the destination project, the bulk action confirmation screen will let you proceed with the bulk action.
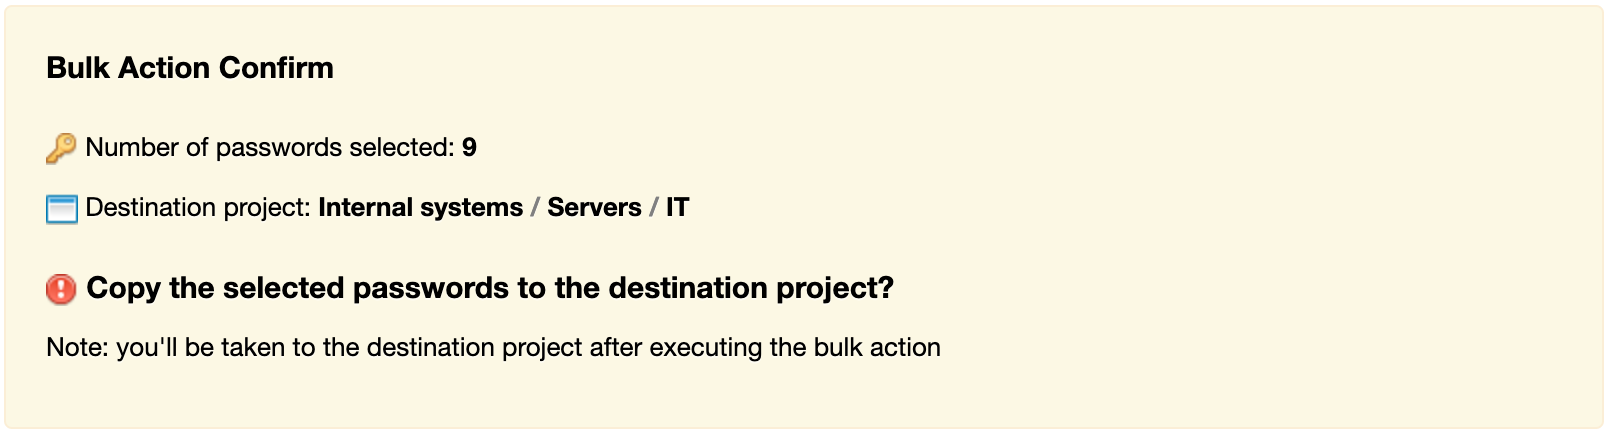
Note that after performing this bulk action, you'll be taken to the destination project.
Bulk action: Move
This bulk action moves the selected passwords to another project. When clicking the bulk "Move" button after selecting the passwords, the project selector screen will appear for you to choose the destination project. Finally, after choosing the destination project, the bulk action confirmation screen will let you proceed with the bulk action.
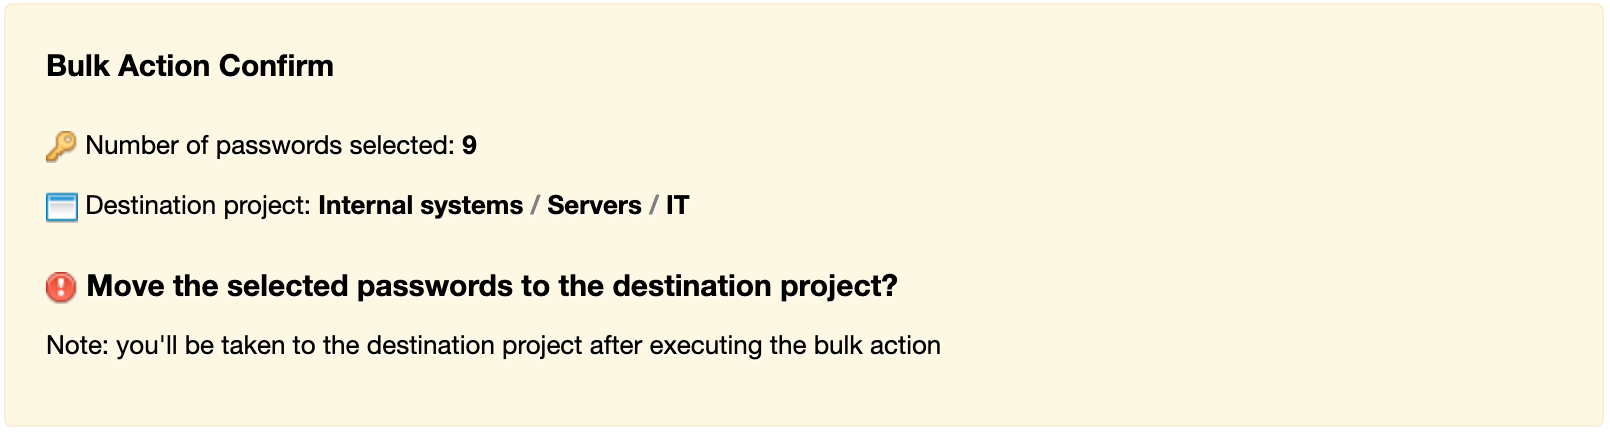
Note that after performing this bulk action, you'll be taken to the destination project.
Document changelog
| Jan 30, 2024: | Document created |